Rhys Davies
on 13 March 2020
How to install Ubuntu with the new Raspberry Pi Imager
The Raspberry Pi Foundation recently released their new “Raspberry Pi Imager” and we love it. It’s a new tool that makes getting going with the Raspberry Pi easier than ever. All it takes is a simple install and three clicks before you have an SDcard ready for Pi. In this article, I’m going to talk about what the tool actually does, Ubuntu’s place within the tool, and how to use it to start a new project.
The Raspberry Pi Imager
The beauty of this tool is in its simplicity. It solves a common problem and lowers the bar for new users with an easy-to-install, quickly-executable app that takes care of everything. There are some features and additions already being requested, but ultimately, they likely won’t be included. There is something to be said for a tool that quite elegantly does the job without worrying about other things or becoming over complicated.
How it works
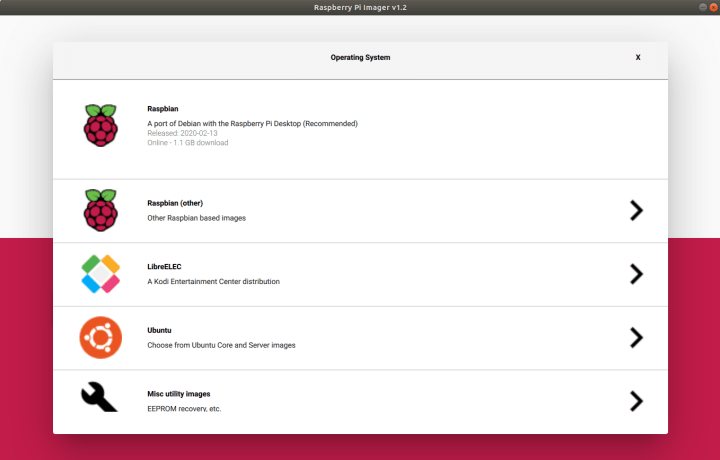
First, the imager downloads a .JSON file from raspberry-pi.com with a list of all of the most up-to-date options to download. When you click the “CHOOSE OS” button a list of operating system options will appear, as well as the options for EEPROM recovery, SDcard formatting and custom image selection.
Once you have selected the OS you want, the tool reads the file directly from their website and writes it to the SDcard. This is a subtle, but large improvement from before. Instead of having to download a file to your hard drive and then write it to an SDcard, the imager does this for you in one step. It also caches the download (saves it locally on your computer) so you can write the same image to other SDcards without having to re-download the file.
How to get the Raspberry Pi Imager
The “how” is the easiest part. Download the imager for any OS by going to the Raspberry Pi download page, and downloading it.
Choosing Ubuntu for the Raspberry Pi Imager
As you can see, Ubuntu is in the first list of options when you click “CHOOSE OS”. If you select this option, you will be able to choose from the latest LTS (Long Term Support) Ubuntu server images, or the latest Ubuntu Core images for either armhf or arm64 architectures. Canonical updates these images with every new LTS.

You also have the option of downloading a non-LTS Ubuntu release. These images contain all of the latest developments and features that Canonical’s engineers contribute to the latest releases. These releases are not recommended by default because they are only supported for six months. After the six-month standard maintenance window, if you don’t update your Pi it stops receiving security updates.
Raspberry Pi Imager tutorials
Thomas Bille, from the Ubuntu web development team, recently posted a blog about a change we have made to how and where tutorials can be found and created. In this new place, you will find a growing number of tutorials that use a Raspberry Pi running Ubuntu. You will also find that each of these tutorials has been updated to use the Raspberry Pi imager.
The idea is to make starting with a Raspberry Pi on Ubuntu as frictionless as possible. We have a tutorial to walk you through the simple steps to create the flashable SD card, and a tutorial to get you fully set up with Ubuntu server for your Raspberry Pi project.
Tutorial: how to install Ubuntu on your Raspberry Pi
As time goes on more of these tutorials will start cropping up. Please leave any comments or questions you have on in the new tutorial section of discourse, where they are written. We appreciate any constructive feedback you have.

Get started
All of this though means nothing though if you’re not using it. Download the imager, search around for some Raspberry Pi tutorials and get building. However, if you already know what you’re doing, and already have Pis scattered around your life, why not get started making tutorials. Create your own Raspberry Pi tutorial on the Ubuntu discourse for the whole community to see. There’s even a tutorial on how to do it. Once it’s there and hasn’t been commented on for a while, we’ll publish it on the website for the whole world to see. Comment around and let us know what you think.
Open-source
This blog was written as a follow up of the Raspberry Pi Foundation’s own blog, which describes the Raspberry Pi Imager as fully open-source and a modification of the PiBakery too, which was later modified and finished by Floris Bos. You can check out Floris’ other software here.