
How to deploy on Azure

Azure is a cloud computing platform developed by Microsoft. It has management, access and development of applications and services to individuals, companies, and governments through its global infrastructure.
Azure web console: portal.azure.com
Prerequisites
A physical or virtual machine running Ubuntu 24.04+
Juju 3.6+ installed via snap
The
Azure interactivemethod (with web browser authenticationservice-principal-secret-via-browser) requires an Azure subscription.See: Azure | Create a subscription - you will need the Azure subscription ID for Juju.
Install the Azure CLI
Install the Azure CLI for Linux by following the official Azure documentation.
To check it is correctly installed, run
user@host:~$ azure-cli 2.65.0
core 2.65.0
telemetry 1.1.0
Dependencies:
msal 1.31.0
azure-mgmt-resource 23.1.1
...
Your CLI is up-to-date.
Authenticate
Choose the authentication method that fits you best.
Follow the official Juju Azure documentation to get an overview of the different methods.
See also this official post for further information and discussions.
In this guide, we use the currently recommended interactive method with web browser authentication service-principal-secret-via-browser. This method does not require logging in with the Azure CLI locally, but it requires an Azure subscription.
Once you have an Azure subscription ID, add Azure credentials to Juju:
user@host:~$ This will start a script that will help you set up the credentials, where you will be asked to fill in a set of parameters:
credential-name: A sensible name that will help you identify the credential set. Store it as<CREDENTIAL_NAME>.region: Any default region that is more convenient for you to deploy your controller and applications. Note that credentials are not region-specific.auth type: Selectinteractive, which is the recommended way to authenticate to Azure using Jujusubscription_id: Use the value<subscription_id>from the Azure subscription created in the previous step.application_name: Generate a random string to avoid collision with other users or applicationsrole-definition-name: Generate a random string to avoid collision with other users or applications, and store it as<AZURE_ROLE>.
After prompting this information, you will be asked to authenticate the requests via web browser with a message that provides a code:
To sign in, use a web browser to open the page https://microsoft.com/devicelogin and enter the code <YOUR_CODE> to authenticate.
In the browser, open the authentication page and enter the code <YOUR_CODE> provided in the output.
You will be asked to authenticate twice, for allowing the creation of two different resources in Azure.
If successful, you will see a confirmation that the credentials have been correctly added locally:
Credential <CREDENTIAL_NAME> added locally for cloud "azure".
Example
user@host:~$ This operation can be applied to both a copy on this client and to the one on a controller.
No current controller was detected and there are no registered controllers on this client: either bootstrap one or register one.
Enter credential name: azure-test-credentials1
Regions
centralus
eastus
...
Select region [any region, credential is not region specific]: eastus
Auth Types
interactive
service-principal-secret
managed-identity
Select auth type [interactive]: interactive
Enter subscription-id: [USE-YOUR-REAL-AZURE-SUBSCRIPTION-ID]
Enter application-name (optional): azure-test-name1
Enter role-definition-name (optional): azure-test-role1
Note: your user account needs to have a role assignment to the
Azure Key Vault application (....).
You can do this from the Azure portal or using the az cli:
az ad sp create --id ...
Initiating interactive authentication.
To sign in, use a web browser to open the page https://microsoft.com/devicelogin and enter the code HIDDEN to authenticate.
To sign in, use a web browser to open the page https://microsoft.com/devicelogin and enter the code HIDDEN to authenticate.
Credential "azure-test-credentials1" added locally for cloud "azure".
Bootstrap Juju controller on Azure
Bootstrap a Juju controller:
user@host:~$ Creating Juju controller "<controller-name>" on <cloud-name>/<region-name>
Looking for packaged Juju agent version 3.6-rc1 for amd64
No packaged binary found, preparing local Juju agent binary
Launching controller instance(s) on <cloud-name>/<region-name>...
- juju-aeb5ea-0 (arch=amd64 mem=3.5G cores=1)
Installing Juju agent on bootstrap instance
Waiting for address
Attempting to connect to 192.168.16.4:22
Attempting to connect to 172.170.35.99:22
Connected to 172.170.35.99
Running machine configuration script...
Bootstrap agent now started
Contacting Juju controller at 192.168.16.4 to verify accessibility...
Bootstrap complete, controller "<controller-name>" is now available
Controller machines are in the "controller" model
Now you can run
juju add-model <model-name>
to create a new model to deploy workloads.
See also: Juju | Microsoft Azure options
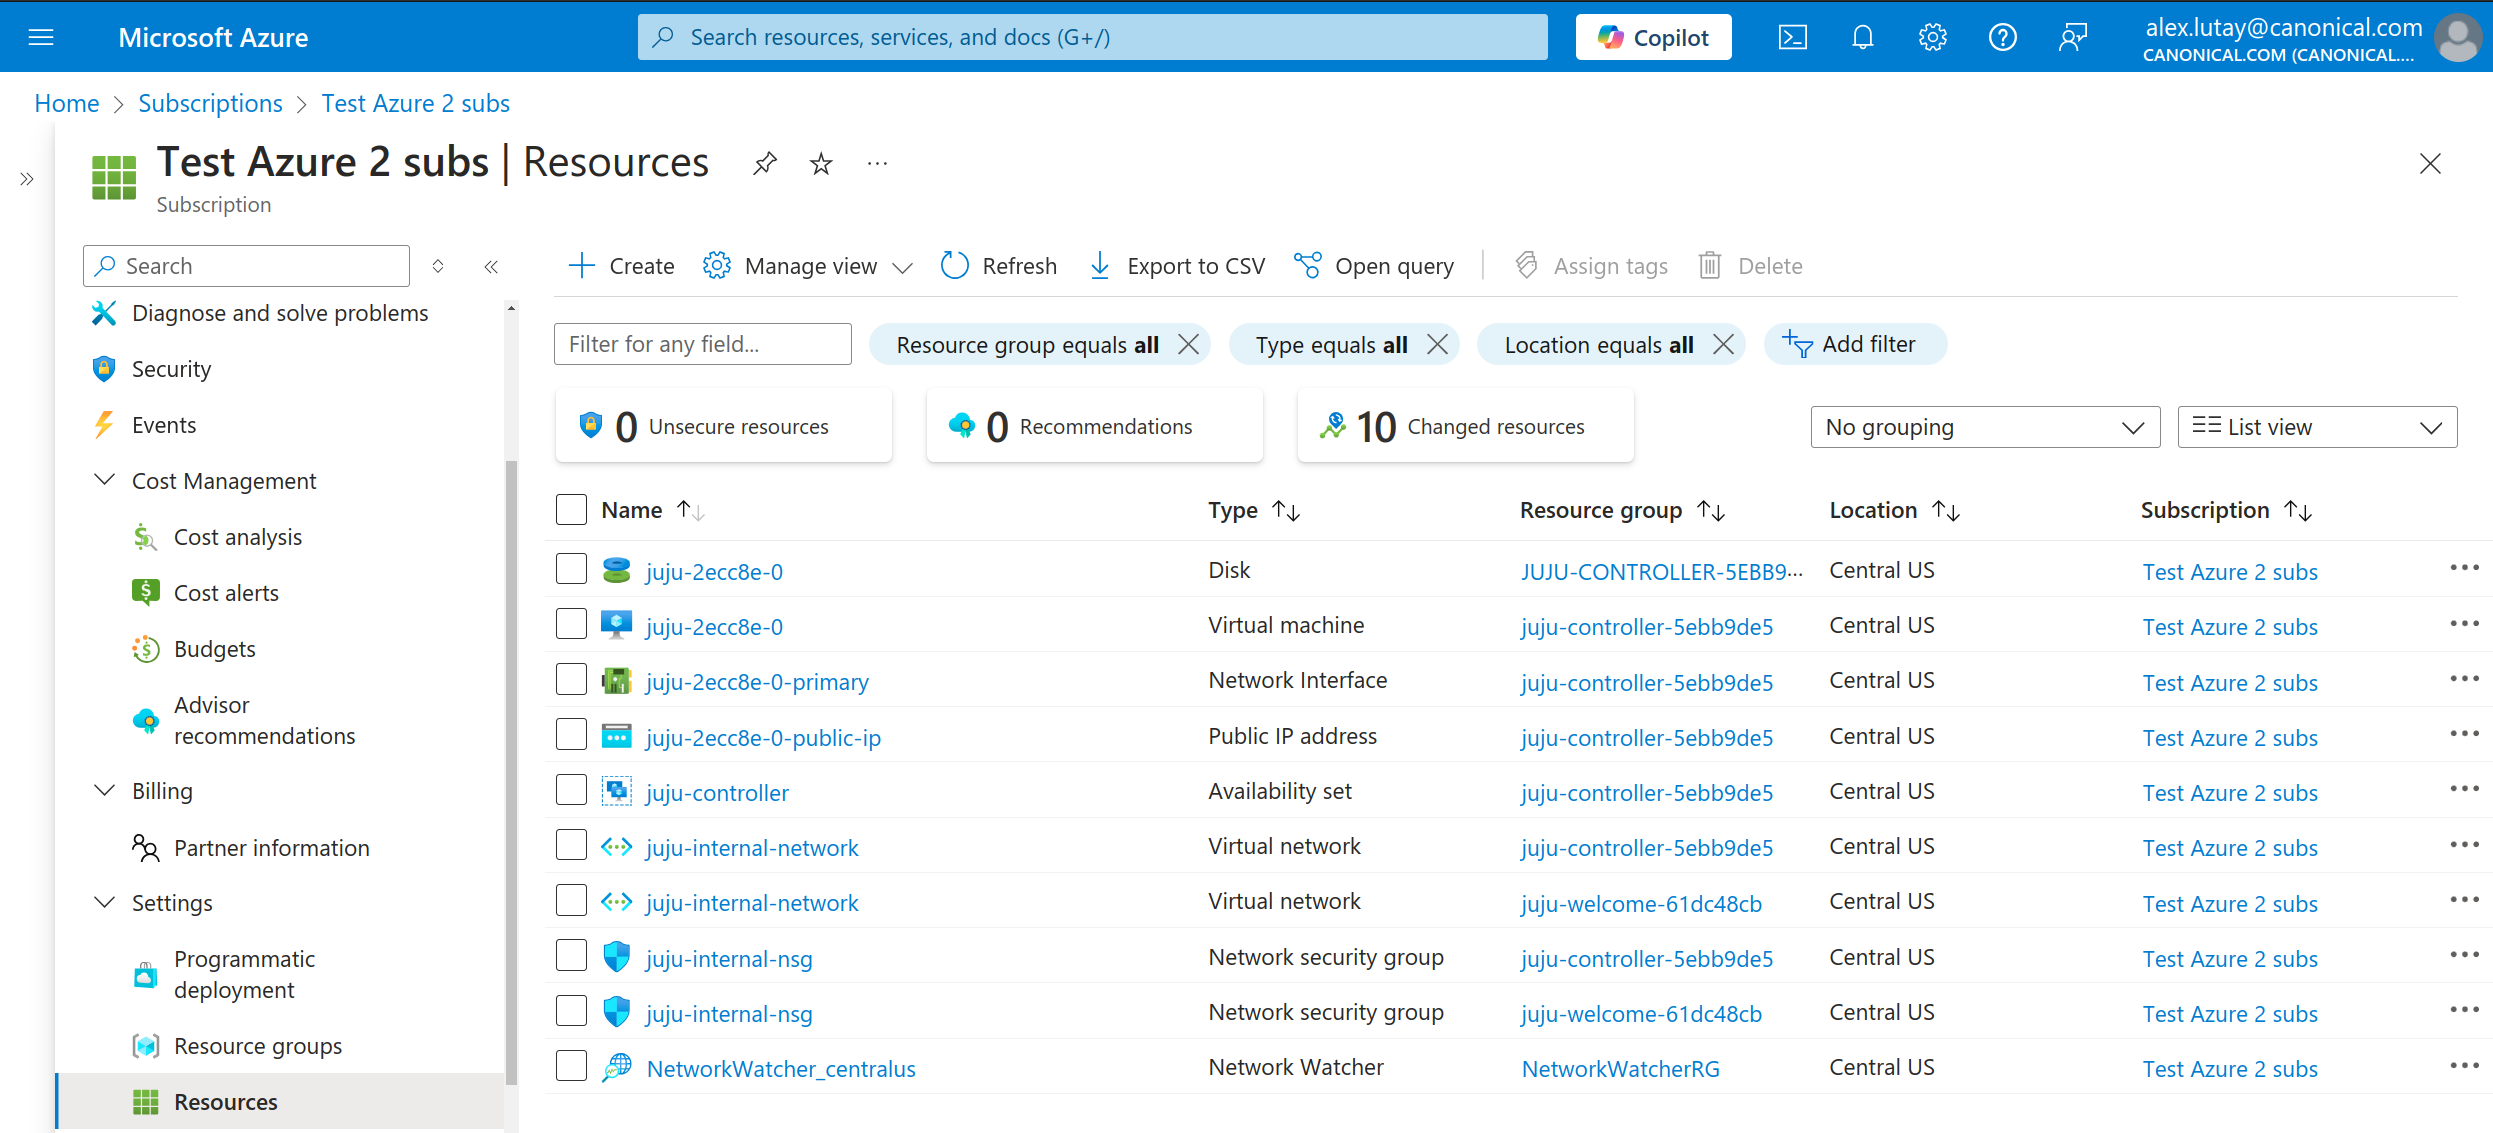
You can check the instance availability in the web interface
Access a test database (optional)
This section walks you through creating and accessing a test database in your newly configured cloud.
Create a Juju model:
user@host:~$ The following command deploys PostgreSQL and the data-integrator charm to request a test database:
user@host:~$ user@host:~$ user@host:~$ Once juju status shows the apps as active and idle, request the credentials for your newly bootstrapped PostgreSQL database:
user@host:~$ Take note of the values for <username>, <password>, and <endpoint>.
At this point, you can access your cloud database using the internal IP address.
All further Juju applications will use the database through the internal network:
user@host:~$ psql (15.6 (Ubuntu 15.6-0ubuntu0.23.10.1), server 16.9 (Ubuntu 14.12-0ubuntu0.24.04.1))
Type "help" for help.
test-db=>
Expose database (optional)
To access the database from outside of the cloud, open the the cloud’s firewall using juju expose:
user@host:~$ Be wary of opening ports to the public
Make sure you understand the risks before doing this in production.
Once exposed, you can connect your database using the same credentials as above except the IP. This time, use the public IP assigned by the cloud provider to the PostgreSQL instance.
You can find it it with juju status:
user@host:~$ ...
Unit Workload Agent Machine Public address Ports Message
postgresql/0* active idle 0 <public-ip> 5432/tcp Primary
...
user@host:~$ psql (15.6 (Ubuntu 15.6-0ubuntu0.23.10.1), server 16.9 (Ubuntu 14.12-0ubuntu0.24.04.1))
Type "help" for help.
test-db=>
To close public access, run:
user@host:~$ Clean up
Always clean cloud resources that are no longer necessary; they could be costly!
See all controllers in your machine with
user@host:~$ Controller Model User Access Cloud/Region Models Nodes HA Version
<controller-name> <model-name> admin superuser <cloud-name>/<region-name> 1 1 none 3.6.1
The following command will destroy the Juju controller and remove the cloud instance - meaning all your data will be permanently removed:
user@host:~$ Next, check and manually delete all unnecessary Azure VM instances and resources.
Make sure there are no running resources left, and run the following command to show the list of all your Azure VMs:
user@host:~$ (...)
user@host:~$ (...)
List your Juju credentials:
user@host:~$ ...
Client Credentials:
Cloud Credentials
azure <credential-name>
...
Remove Azure CLI credentials from Juju:
user@host:~$ After deleting the credentials, the interactive process may still leave the role resource and its assignment hanging around.
We recommend you to check if these are still present with:
user@host:~$ You can also check whether you still have a role assignment bound to <credential-name> registered using:
user@host:~$ If this is the case, you can remove the role assignment first and then the role itself with the following commands:
user@host:~$ user@host:~$ Finally, log out of the Azure CLI user credentials to prevent any credential leakage:
user@host:~$